
India’s Growing Need For Dust Collection Technology
Dust control is now a big need in India. Many…
Read More →Changing your filter bags is a part of life in any industrial plant. However, it is not just a routine chore. If done wrong, it can be messy, unsafe, and can even damage your machine. At ClipOn, we believe that a clean plant starts with a safe maintenance plan.
As a leading filter bags manufacturer, we want to make sure you get the most out of our products. This guide will walk you through the process of replacing a dust collector bag filter while keeping your team safe and your air clear.
You might have the best bags from the top dust collector bag filter manufacturers, but if they are installed poorly, they will fail. A small gap at the top or a twisted fabric can lead to:
Before you open the baghouse, you must prepare. Safety is the most important part of the job.
Before you start, run the cleaning cycle one last time and empty the dust hoppers at the bottom. This reduces the amount of loose dust that falls on you when you pull the bags out.
Open the top access door. Most modern systems use a “snap-band” fit.
This is a step many people skip, but it is vital. As a filter bags manufacturer, we know that a rough cage will ruin a new bag.
The cell plate is the flat metal sheet with holes where the bags hang. Use a damp cloth to wipe the edges of every hole. If there is dust or grit on the plate, the new bag will not seal correctly. A clean plate ensures a perfect, airtight fit.
Take your new ClipOn bag and lower it into the hole.
Slowly lower the cage into the bag. Do not drop it! If you drop the cage, the weight can rip the bottom of the new bag. The cage should slide in smoothly. If it feels stuck, do not force it. Take it out and check for twists in the fabric.
Once all the bags are in, double-check that every bag is seated flat against the plate. Close the doors and make sure the gaskets are tight.
To get even better results, keep these tips in mind:
At ClipOn, we don’t just ship boxes; we provide solutions. Our filter bags are designed to be easy to install and tough enough to last. We use high-grade fabrics that handle the heat and chemicals of your plant without breaking a sweat.
When you buy from a trusted filter bags manufacturer, you get the peace of mind that your emissions will stay low and your plant will stay running. We take pride in our work so you can take pride in yours.
Replacing your bags doesn’t have to be a headache. By following these steps and prioritizing safety, you can keep your air clean and your costs low. Remember, a well-installed bag is a long-lasting bag.
Is it time for a bag change?
Don’t settle for cheap filters that fail early. Visit ClipOn.io today to explore our full range of high-performance bags and cages. Our team is ready to help you find the perfect fit for your dust collector. Let’s work together to make your plant a cleaner, safer, and more productive place to work.
Dust control is now a big need in India. Many…
Read More →
Choosing a filter bag by material name alone is like…
Read More →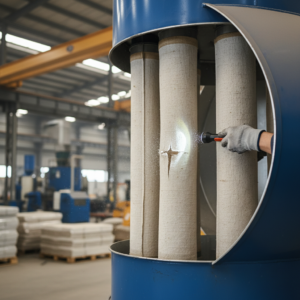
Clean air, safety, and effective production processes depend on having…
Read More →